Hi, I'm Craig Abbott, an interaction designer at DWP Digital.
A little while ago I wrote a blog about how we spotted a room-booking problem and designed a solution for it.
I got quite a few questions from readers after it was published asking how we built it.
Now I’m going to go through it bit by bit to show you how it works in much more detail for those who are interested in the technical side of things.
The whole room booking system is made up of:
- an application programming interface (API), which is a way of letting different computer systems talk to each other on the internet
- a front-end, which is what a user sees and interacts with
- a Raspberry Pi, a small, programmable micro-computer

The API
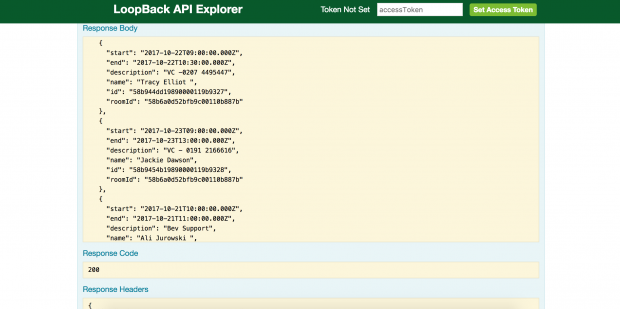
This is a RESTful API. It sits on top of a database, has no pages to view and means a network of connected computers (known as ‘endpoints’) can send, receive and store specific information.
This API uses:
- nodejs, a platform for easily building quick network applications
- StrongLoop, a Node.js framework that lets lots of users send information to a small number of endpoints
- MongoDB, a tool for building databases

It is built as a series of models that link together. For example, a location has rooms, and each rooms has bookings. Because these models are flexible and not fixed, it means a new location or room can be added without having to reconfigure the whole API.
It scales comfortably, so if new rooms or locations are needed, and the entire thing can be lifted and put to work in a completely different building very easily.
The front-end
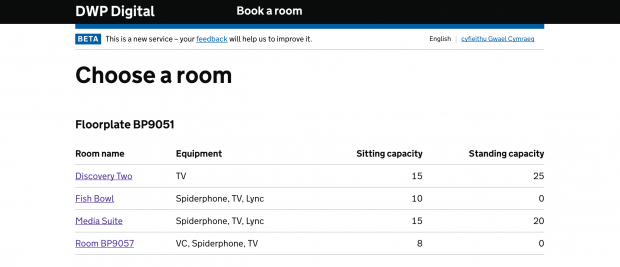
This is the buttons, the links, the information on the screen and is sometimes called a ‘user interface’.
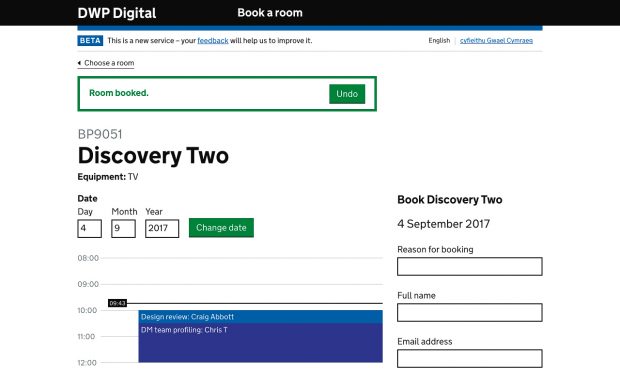
When someone books a room, this front-end application sends the details (the date, the room number and the name of the person booking) to the API to be stored in the database.
When another user looks at the room booking schedule, the front-end takes data from the API to show existing booking details.

It is built using Node.js, along with:
It’s designed to look very similar to a GOV.UK service. It has been built using existing GOV.UK elements and design patterns where possible. The application is also fully responsive, which means it can be viewed on different sized screens like smartphones or tablets.
As the hub management team need to make sure only authorised people are booking rooms, the application can only be used by people in our building. As long as someone is connected to the GSI network or their hub’s wifi network then they can book rooms. If not, the app won’t load for them.
If you want to build something similar, you’ll need to find out which network to connect to from your IT team.
For us, this was the easiest way to meet this need without building and storing user profiles and log-in systems.
The Raspberry Pi application
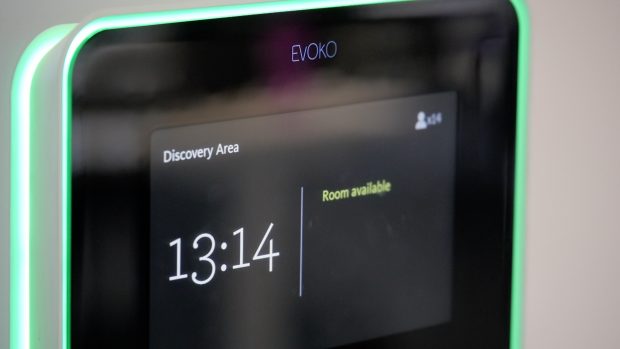
We use a Raspberry Pi to show people whether or not a particular room is booked. It gets booking information from the API.
Find out more about how I built the application for the Raspberry Pi.
It is built using Node.js and Marko.js and is installed on a Raspberry Pi running the Raspbian operating system.
The design for this was deliberately visual. I used bright green and red backgrounds help people quickly decide if a room is free or busy.
To make the page more accessible, the words ‘Free’ and ‘Busy’ take up around 20% of the screen, so if you have an issue differentiating between red and green, it’s still the most obvious thing on display.
The coding of the app is as lightweight as possible as to minimise the work the Raspberry Pi has to do. At first, the Raspberry Pi talked to the API every minute via Ajax, a technique that lets information be shared in the background.
This seemed very resource heavy, so it was then iterated and changed to use the WebSockets application instead of Ajax. This had far less overhead but was still reliant on Javascript.
Eventually, everything was stripped out and the page is now served as static web page that is refreshed every minute, using a ‘meta http-equiv’ HTML tag. This means we don’t have to rely on JavaScript so the application is far more reliable. And because the app is running in Chromium, an open-source browser, there is no flickering on refresh. The entire thing remains seamless.

Configuring the Raspberry Pi
To get the Raspberry Pi working as a plug-and-play device there were several steps I needed to take. Raspbian ships with Node.js 0.10, so updating to Node.js 7 was the first step.
Then, I needed to make the Node.js server run on startup and launch the Chromium browser in ‘kiosk mode’. This lets a browser window be opened without any toolbars or menus - so you get an ‘empty’ page. This involved some tweaking of Raspbian.
In testing, the application would occasionally lose its Wi-Fi connection. We found that in most cases, removing the Wi-Fi dongle and plugging it back in fixed this, so we added a Cron job, which runs scheduled checks, to keep an eye on the Wi-Fi connection every minute and attempt to reconnect the USB dongle if it had gone down. It was the coded equivalent of pulling it out and plugging it back in. This means that most of the time, the Raspberry Pi can be left unattended and it will maintain itself.
If the Wi-Fi does go down and the Raspberry Pi is not able to recover from it automatically, we are able to capture this and show an error page that tells any passers-by that it is OK to turn the Raspberry Pi off and on again. This is because the application runs locally.
If you want to use the application, you’re welcome to fork the GitHub repository and install it. If you add any features and want to put them forward for contributions feel free to issue a pull request.
If you have any other questions about the that aren't covered above, leave a comment below or tweet me @abbott567 and I'll do my best to respond to you. Thanks for reading!

Recent Comments